Proper Mic Positioning in 11 Steps or Less
When most audiobook narrators are setting up a booth, one place they tend to get stuck is understanding how to find the optimum position for their microphone.

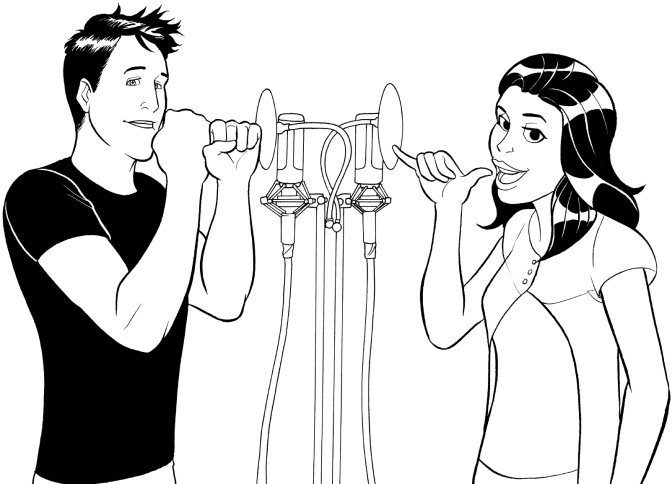
The common advice that leads to lots of poorly placed microphones.
The 2-Fist or Hang-10 approach is the most common thing that people will say. Unfortunately, often, it’s just plain wrong. In this post, I walk through some steps (and try to explain the reasoning behind each) so you can learn how to find the optimum positioning for your LDC (Large Diaphragm Condenser) microphone.
Step 1
First, remove all pop filters, socks, and windscreens from your microphone. It is going to get in the way while you are doing the next few steps. And, hopefully, once you are done, you won’t be needing it anyway.
Step 2
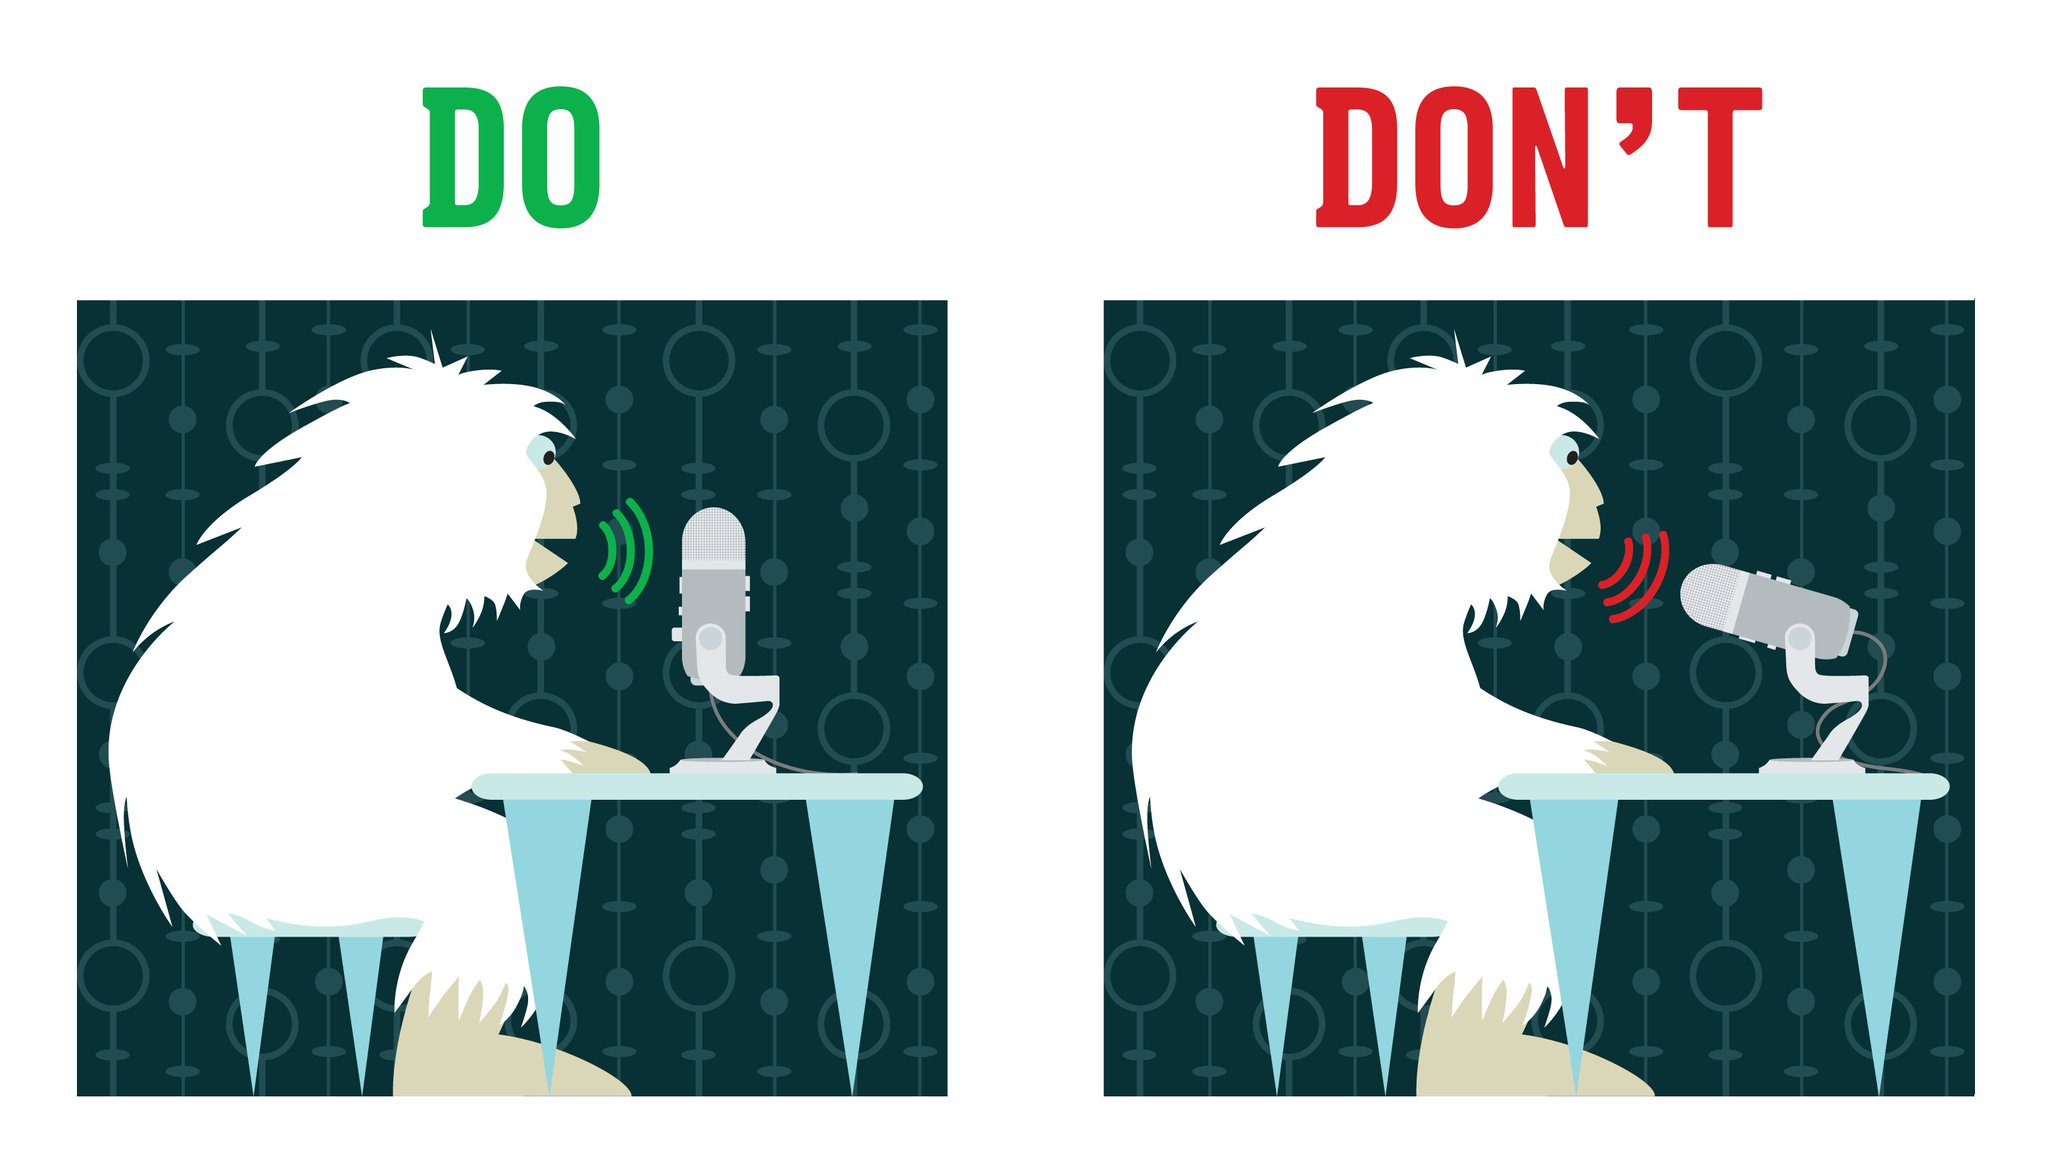
Next, look inside and see the circular disc. This is the diaphragm (and capsule) of the mic. Think of that circle as an eye. When we are done, the “eye” needs to be looking into your mouth. Remember, your mic is a Side Address microphone, not an End Address microphone.

I may not be a fan of Blue Microphones, but this graphic is spot on!
Step 3
Also, make sure you aren’t looking at the back of the diaphragm. Using your fingernail, lightly scratch the metal basket on both faces of the mic. The one that sounds louder is the front.
Step 4
Next, position the front of the flat circle only about 4 inches from your mouth (Yes, this is too close).
Step 5
Start to talk. Pay attention to your voice. You will hear the mic over-emphasizing the deeper colors within your sound (lower frequencies). Get used to what this sounds like.
Step 6
Now, move the mic all the way out to 12 inches but maintain everything else (Yes, this is too far).
Step 7
As you talk, first you will note the differences in the low frequencies.
Next, you will note that between your words, we hear more of the room around you.
Step 8
Next, bring the mic back to 4 inches away from your mouth (as in Step 4). Then, slowly move the mic away a tiny bit at a time as you continue to talk.
You want to find the distance where the over-emphasis of the low frequencies disappears but before we hear a lot of the room.
If you’ve gone out more than 8-10ish inches, you’ve gone too far. Go back to Step 1 and start over.
If you’ve gotten to this point multiple times but are either too close or too far from the mic, you’ll need to adjust your gain. Decrease your gain if you are too close, increase it if you are too far from your mic. Now, go back to Step 1 and start over…
Once you have found the right distance. We can now find the right position for you to use so you do not need pop screens/etc.
That has a lot to do with angles.

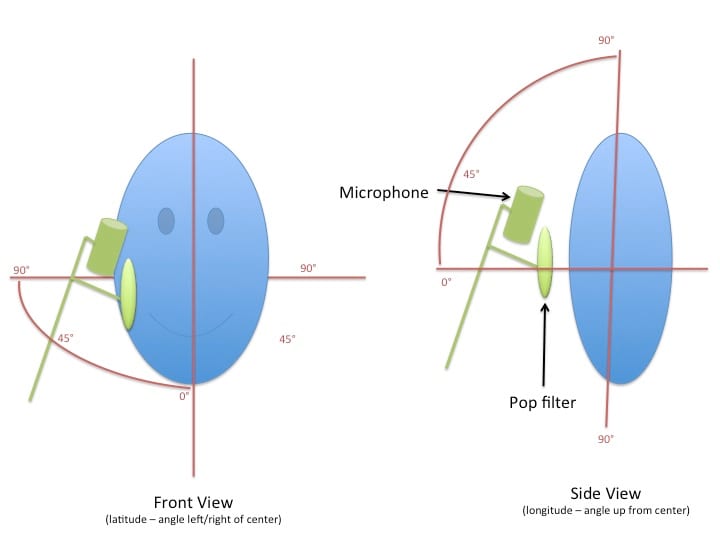
This image was from an old blog post of mine. Note that there are Pop Filters on the image. We are going to prove to you that they usually aren’t needed in the next few steps.
With the mic set to the optimum distance that you discovered in Step 8, next we are going to find the proper angle (while maintaining that distance.
Imagine a string running from the capsule of the mic to your teeth that is fully taut, without any slack. Think of your head as a globe. This gives us a way to talk about changes in both the longitude (left/right) and the latitude (up/down) of the mic, while maintaining the Step 8 distance.
Step 9
First, let’s try shifting the microphone up 20-30 degrees in latitude. Remember that the capsule in the mic needs to be pointed at your teeth/chin area. The distance from that capsule to your teeth/chin should be the same as it was in Step 8.
If such a position is impossible in your booth, skip to Step 11.
Step 10
While keeping your face looking forward (not up at the mic), say the following two phrases a few times:
Peter Piper picked a peck of pickled peppers.
Seven silver swans swam silently seaward.
Notice that the bursts of air from your P’s and your S’s, fly forward missing the microphone completely. This is why you really don’t need the pop filters/etc for audiobook narration in most cases.
Windscreens and pop filters are intended for singers who need to be right up on top of the mic. They are there to make the best of a bad situation. At best, they mitigate (not eliminate) the effects of those bursts of air. If you learn to work without them, you will be more conscious of your mic technique and it will improve over time.
Step 11
This step is really only useful for people who could not find a good spot for Step 9. Instead of changing the latitude, try changing the longitude of the mic (to the left or the right). You should not need to shift it more than 20-30 degrees from center.
Remember that the capsule in the mic needs to be pointed at your teeth/chin area. The distance from that capsule to your teeth/chin should be the same as it was in Step 8.
Once you have found a good position, go back to Step 10.
Of course it is possible to use a combination of Steps 9 and 11 to find a perfect position. It felt like overkill to turn that into a 12th Step though.
I am favoring positions where the mic is mounted above you, looking down because I am using you as a sound absorber.
Since your LDC microphone primarily hears what is in front of its capsule, you can actually point the capsule so it looks at your chin/chest, instead of teeth.
Doing this, gets a bit more chest resonance (a very pleasant sound for most people). And, any sound waves bouncing around the booth would need to pass through you in order to get back to the mic’s capsule.
And, no offense intended, but you are the densest thing in the booth. 😉
Over time, you will learn how to get the most out of this new positioning. Here’s one thing to try…
If you lean slightly closer to the mic, based upon the distance set in Step 8, you should create a bit of proximity effect. This change in the texture of your tone can be useful in many ways — affecting character and/or tension being the most common.
If this new positioning is very different from where you had your mic placed previously, it may take a while to adjust. A few narrators have told me that simply getting the pop filters/etc out of the booth made their workspace feel less cluttered. And that, in turn, let them feel more at ease in the booth.
Remember, the tech is there to help us preserve and share the act of storytelling. Anything that can be done to minimize/simplify its presence, allows us as narrators to relax into the story more fully. And that, invariably better serves the art of what we do.
☕ Cup of Coffee
A ridiculous amount of caffeine was consumed while researching.
Add some fuel if you would like to help keep me going!
